


SOME TECHNIQUES FOR BROODING CHICKS
SOME TECHNIQUES FOR BROODING CHICKS
1. Housing and Equipment
The brooding house must be well-sheltered—warm in winter and cool in summer—while avoiding rain and drafts. Bedding should be rice husks, sawdust, or straw, spread 9–13 cm thick. Stocking density should decrease with age: 30–40 chicks/m² in week 1, 20–30 in week 2, 15–25 in week 3, and 12–20 in week 4. Use a 50x50 cm tray feeder for every 50 chicks initially, then switch to age-appropriate feeders. Use 1-liter plastic drinkers for the brooding phase.
2. Brooding Temperature
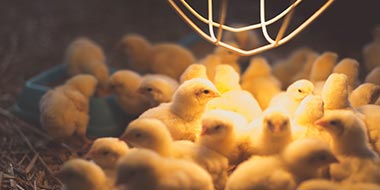
Use 250W infrared bulbs (5–10 bulbs per 1,000 chicks depending on the season) or charcoal stoves (ensure proper exhaust). Adjust temperature based on chick age: 31–32°C for days 0–7, 28–30°C for days 8–21, and 22–28°C for days 22–28. Monitor chick behavior: huddling under heat sources means they are cold; spreading out and drinking excessively suggests overheating.
3. Air Quality
Air quality critically affects chick health and growth. Harmful gases like ammonia (NH₃) and carbon dioxide (CO₂) can irritate the respiratory system, reduce feed intake, and even cause blindness if levels exceed safe limits. Since farmers can get used to the smell, it's better to observe chick behavior (lethargy, coughing, rapid breathing) or use measurement tools if available.
Humidity should be kept between 50–65%. If it falls below 50%, reduce fan runtime; if it exceeds 65%, increase it. Morning is the best time to assess air quality and adjust ventilation accordingly.
4. Ventilation
Proper ventilation removes excess moisture and harmful gases, maintaining a stable brooding environment. Ensure adequate static pressure (about 0.10 inch) to push air to the center of the house. Air inlets should be adjusted so air doesn’t blow directly on chicks or feeders. Close inlets outside the brooding area and adjust those inside to direct airflow properly. Fan runtime should be calculated based on bird density and house conditions, using online tools if needed.
5. Drinking Water
Clean, readily available water is crucial for a good start. Before chick arrival, clean and flush the water system, check nipples, and set drinker height correctly. Upon placement, give chicks water with glucose and vitamin C-electrolyte solution within the first 2–3 hours to reduce stress and boost immunity.
6. Feed
Early and easy access to feed helps chicks adapt and grow. While feed quantity is low in the first week, distribution is key so all chicks can access it. Place feed trays in dry, warm areas free from drafts. Monitor feeding behavior—if many chicks have empty crops after 24 hours, adjust the environment or feeding layout.
7. Lighting
Light stimulates feed and water intake, activity, and growth. During the first 7–10 days, maintain at least 3 foot-candles (about 30 lux) along feed lines. Continuous lighting in the early days helps chicks adapt and find feed and water more easily.
8. Vaccination Schedule
- Marek: Day 1
- Newcastle 1st dose: Day 3–5
- Fowl Pox: Day 7
- Gumboro 1st dose: Day 10
- Newcastle 2nd dose: Day 21–24
Farmers should stay updated on weather and disease outbreaks to take timely measures and reduce risks.

 22/10/2026
 22/10/2026
 22/10/2026
 22/10/2026